

Want to find out how I created this awesome nail? Read on!!!!
Here are all the nail polishes I uses, I will name them all in the steps:
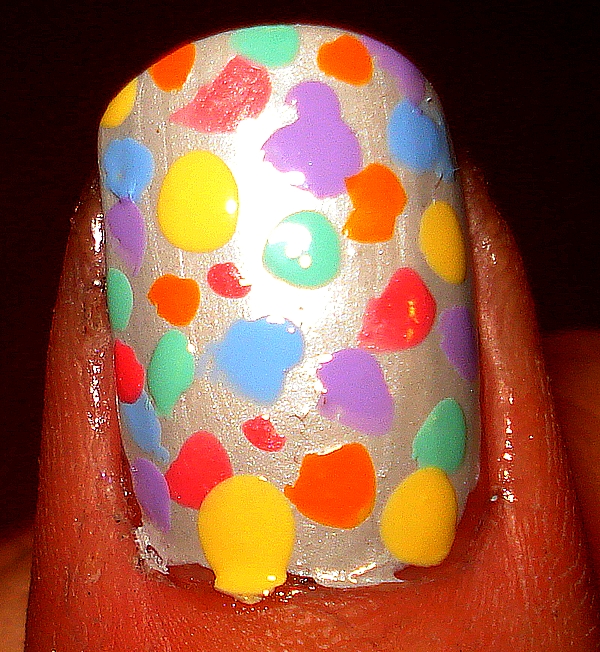
(the orange looks brighter than it should... its a bright toned pastel orange)

Since spring is all about pastels I inspired myself from those colours. This look also makes me think of Easter eggs so I think it would be appropriate for the holiday! I know, there are a lot of colours, but you cold modify this to your liking. You can only use two colours as much as you can use all the colours in your collection. Now lets begin.
1. Base coat.
Obviously, this is optional! I recommend using a base coat because it helps preventing chipping, and when you take the effort to make a look like this one you want it to last right? I am using Essie's first base coat.

2. Base Colour.
At first I looked for my white, which turned out to be completely dried out. I looked around for something that could work and I found the Color Club's Pretty in Platinum which was part of their Indulgence collection. Turns out this colour is a better alternative to white, it works perfectly because its a silver toned white! But obviously white would have worked as well!

3. Pink.
I do not own a pastel pink (surprisingly) so I decided to use a light pink by OPI called A Dozen Rosas. This is my favourite pink, but has been discontinued since 2009, but its still possible to use. For this look, I would not recommend using OPI lacquer because the brushes are very wide, but seeing as this is an old polish, it came with the original brushes so it all works out!
This is very simple, just dot your nails a few time with the polish. make sure you don't have too much product on the brush so it does not get messy. I tend to put 2 drops on my pinky, 4 on my thumb and 3 on the rest (approximately).

4. Orange.
I do not own a pastel orange either, so I decided to use the most tamed orange I own, which is Wet and Wild's Sunny Side Up. The flash of the camera makes this colour look neon, but it really is not! Wet and Wild colours are great because they are only a couple dollars and work so well for fun looks like these!

5. Blue.
Next, I applied Joe's Powder Blue. I love Joe nail lacquers because they are only about $3. They are only 6ml full though which is a little less than half the amount of an OPI & Essie Lacquer (15mL). On the other hand, I probably never finish most of my lacquers so I rather have less and just go buy more if I want more.

6. Green.
Again, like all the rest, it is Joe's Mint. It is a great lacquer aswell.

7. Yellow.
Next is Joe's colour in Butter. As you can see I love Joe's pastel colours, they have a wide variety!

8. Lilac
Finally, I applied Joe's Faded Violet. After this step I was done with all the colours.

If you have random wide spaces in between some dots just go back and fill them in with colours for the best look. You can also make the look more intense than I did and overlap your colours, or do the opposite and simply put less for a calmer effect. If you do not want a spring look, go for some neons or something. Even put a black base colour. Go crazy!!!
9. Top Coat.
Once all the colour is done with, put a top coat. I love OPI's Top Coat! This will simply protect you look for a longer time. It will also give your nails an even texture and a glossy effect, so I recommend it! Once this is finished with, you are done!!

You're Finished!!!


0 comments:
Post a Comment